
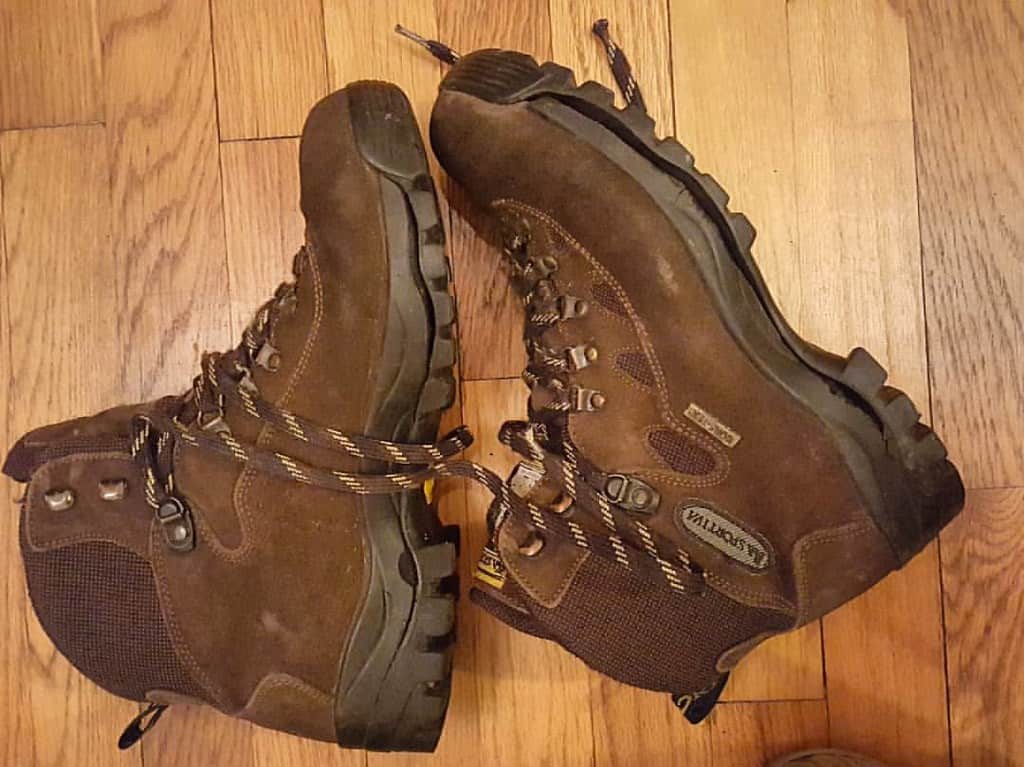
Hiking boots and shoes can serve you for 2 to 5 years, depending on their construction. The care you give to your hiking boots and shoes also determines how long they serve you without wearing out. Footwear is essential because regardless of how experienced you are as a hiker if your feet are not comfortable t in the boots or shoes, your hiking experience won’t be as fun as it should be. There are at-home repair tips for hiking boots and shoes, which are easy for when you need to fix or repair your hiking boots and make them as good as new.
Easy Fix and Repairs for Hiking Boots
Cracked leather
You can use a water-based leather treatment if your leather begins forming cracks to prevent your boots from getting completely ruined. If your shoes have severe cracks, have them patched up or restricted before they get worse. At times you may notice a crack on your boots after it has already affected them, at which point you are advised to use duct tape to act as a temporary repair till you find a more permanent solution.
Delaminated sole
Hiking boots and shoes with delaminated soles can make your hiking experience very uncomfortable and stressful, which beats the purpose of hiking. This issue can, however, be fixed using duct tape in the comfort of your home. You first need to clean the interfaces of the boots where the glue failed and use a Gear Aid Free-sole for reattachment, and your shoes are as good as new. It is also advisable to pick out the debris between the upper and sole and use an alcohol prep pad to wipe the sole. If the damage is on the toe, use the Free sole and squeeze the parts together. You can use duct tape to wrap it tightly, and for additional pressure, you can slide a pen beneath the duct tape.
Mesh panel
If your shoes’ or boots’ mesh panel tears when you are hiking, it can ruin your hiking plans and the whole experience. This inconvenience can, however, be easily corrected using a shoe-specific patch. In case you can’t access this shoe-specific patch, you can use the alternative of a square of a bandana to prevent dust and debris from entering your shoes or boots.
Frayed or broken laces
This is the simplest and easiest fix for hiking boots or shoes. All you need to do is take out the laces from the shoes and check them over for frays or breaks. If there is any sign of frays or breaks, you can easily replace the laces to avoid snapping when you are out in the field. Replacing laces is very easy and cheap and recommended for a stress-free hiking experience.
Tips for Fixing Hiking Boots and Shoes
Hiking boots and shoes may need repairing from time to time as a result of worn-out heels and breaks. These breaks occur in the leather, especially along the boundary between the rubber sole and the leather upper. To determine how and where to fix your boots and shoes for hiking, the following should be adhered to;
Determine what needs to be fixed
When hiking boots are used for long, the heels begin to wear out, and so does the leather along the edge of the sole. When this happens, it can be an indication of a wrong fit or poor posture, both of which need to be corrected as soon as possible so that your feet don’t end up falling off the shoes while hiking. If the logo keeps catching on the lacing hooks when you walk, it can be an issue that needs addressing. Once you figure out what the problem is with your hiking shoes or boots, it becomes easier to fix them.
When repairing, follow the leather along the sole technique
When fixing your hiking boots, it is advisable to do this repair leather along sole by cutting the leather away from the rubber sole. However, be careful not to cut yourself while trying to fix them. It is advisable to do these repairs when your hiking boots or shoes are completely dry to allow the material to accept the glue quickly.
Applying the leather patch
You can stitch the edges of the leather together if possible, taking note that leather is very tough. Using flexible glue to cover the cut with leather is a good idea and ensures that the patch can be easily slipped between the shoe’s leather and the sole’s rubber. Suede leather that is not finished on either side is perfect for fixing hiking boots because it is flexible, and it is also rough, which helps the glue to stick well. It is also advisable not to use a plastic thimble when working with leather as too much pressure on the thimble can cause the needle’s back to wound your finger. It is also advisable to fix your hiking shoes or boots in an open room. This is because the solvents used in the glue can make you pass out very quickly, which is unhealthy.


Leave a Comment